Butter Beer Cheesy Pork

Mmm, beer. What real men drink. And yet, how many of you know that beer is an excellent ingredient in the kitchen? In soups, stews, and marinades beer adds dimension like no other liquid. I tell you what, I like cooking with beer more than I like drinking it.

This recipe is a fairly original creation of my own, it is a combination of a few other recipes. I’ve made this numerous times, and every time it has turned out great. I love making it for guests in the summer as well.
Butter Beer Cheesy Pork

  • 4 10oz or so pork chops, cubed cutlets, tenderloin steaks, or any other pork steak cut you fancy.
  • 1 12 oz bottle honey wheat beer, the stronger the flavor the better.
  • 2 cloves garlic, minced
  • 1 tbsp olive oil
  • ¼ tsp salt
  • ½ tsp ground black pepper
  • 1 cup green onions, sliced thin
  • ½ cup chopped roasted pecans (bake in oven at 350 for 10m to roast pecans)
  • 2 tbsp flour
  • 2 tbsp butter
  • Sharp cheddar cheese, shredded, to taste (1-2 cups usually).

Alright, step one, pour the first 5 ingredients (through black pepper) into a zip top plastic bag with the pork. Set it into a bowl in case of leaks, and stick it in the fridge for 4 hours or overnight, longer is better.

Preheat your grill so that it is hot. This dish also tastes well when smoked. So you could use it with plank grilling (cedar). Take the meat out of the marinade, toss it on the grill (or on the wood plank on the grill) and cook to desired doneness, 30-45 minutes usually. But this will vary greatly depending on what cut of meat you are using.

When pork is about half way done put a saucepan on medium heat on your stove. Melt the butter and then when the butter is melted add the flour and whisk rapidly for 3-5 minutes. Then add the reserved marinade from the plastic bag and bring to a boil.

Once you’ve reached a boil let it boil for a few minutes, stirring occasionally, just to make sure it is fully cooked (the marinade was with raw meat after all) then lower the heat to a simmer and start adding the cheese, while whisking constantly.

Here you have decisions to make. How many people are you serving? How much sauce do you need to cover all that pork? I usually end up tossing in another beer into the saucepan, and more cheese, to make more sauce because I like the sauce. Since beer isn’t usually sold in 1 bottle packs, you’re bound to have another bottle in case you need to do the same. If not, water works but isn’t as flavorful. If you need to thicken the sauce more and do not want to add more cheese, make a corn starch slurry (equal parts cold water and corn starch, mixed together in a separate dish, then poured in, it has to be corn starch, flour will not work with cold water like this). Keep tasting the sauce to make sure you like it. The goal here is to make a good, syrup-like thickness, cheese sauce, in enough volume to cover all the meat.

When you’re happy with the sauce and the pork is done, toss in the green onions and chopped pecans, mix, and then pour the sauce over the pork (or, pour it into a bowl and let people serve it themselves).

Is this dish healthy? Sorta, many pork cuts can be very lean, and you’re having relatively small servings of 8-10oz per person. The cheese sauce isn’t as healthy as it could be, but cheese is a very worthy guilty pleasure. The trick though is in the side dishes. Serve this meal with healthy sides like grilled or baked veggies, fresh fruit, and things like that. Don’t serve any bread, pasta, rice, or other starches with it. The pork itself might not be as healthy as it could be, but with good sides the overall meal can be.

Whole Grain Healthy Banana Bread

This bread is packed with nutrition and makes a great heart healthy snack. It tastes great, you’ll never guess it has no oil, no butter, and no added sugar.
Banana Bread

Ingredients

  • 3/4 Cup Splenda
  • 3/4 Cup Flaxseed Meal
  • 5 very ripe bananas, peeled and mashed
  • 1/4 cup skim milk
  • 1/4 cup Egg Beaters or egg whites
  • 1/4 cup low fat sour cream
  • 2 cups stone ground whole wheat flour
  • 2 tsp baking soda
  • 1/2 tsp salt
  • 2 tsp cinnamon
  • 1 tsp ginger
  • 1 tsp nutmeg
  • 1/2 cup raisins or other dried fruit (optional)
  • 1/2 cup chopped pecans or other nut (optional)

Directions

  1. Preheat oven to 350 degrees.
  2. Spray a 9′ x 5′ loaf pan with cooking spray.
  3. Mix together Splenda, flaxseed meal, bananas, milk, sour cream, egg whites, raisin, and nuts until well blended.
  4. In a different bowl mix together flour, salt, baking soda, and spices.
  5. Mix the two bowls together until the mixture is evenly moist, do not overmix.
  6. Spoon into your pan and place in oven for 45-75 minutes, cooking times will vary, use a toothpick to test for doneness.

Beefless Beef Stew, Healthy and Satisfying

I like beefy flavors, and nothing beats stew on a cold day, plus it is easy to make. But, beef isn’t the healthiest of meats, so what do I do? Use buffalo, just like with my healthy cheese burgers.

Thus, I make beefless beef stew that is still beefy and full of protein. And as I’ve explained in previous posts, lean buffalo (bison) has less fat and cholesterol than boneless skinless chicken breasts. It is a great substitute for beef.

Buffalo Beef Stew

  • 1/3 Cup Cornstarch
  • 2 Cartons Beef Stock
  • 2 Pounds Buffalo Meat, chopped
  • 2 cups potatoes, chopped
  • 1 very large yellow sweet onion, chopped
  • 2 cups carrots, chopped
  • 1 10.5 oz can of whole kernel corn
  • thyme, bay leaves, garlic
  • 2 cups peas, frozen thawed
  • 2 beef boulliion cubes (unless you want to cut down on the salt)
  1. This is an all day affair, you’ll want to use a large capacity crock pot, 6-7 quarts. Step 1, 2 cartons of beef stock, the good stuff. Pour it into a cold crockpot, then whisk in 1/3rd cup of corn starch. We’re using corn starch as a thickener because unlike flour it will not clump in cold liquids. If you want it thicker add a half cup.
  2. Add your onion, carrot, buffalo, and potatoes. Add 2 boullion cubes. Add 2 bay leaves, 2 tablespoons of dried thyme, add 3 cloves of garlic, put the lid on, and let it cook 8 hours. I like little baby red skin golden potatoes, but redskins or yellow skins would do fine, russet potatoes will not work well, learn more here
  3. 30m before you want to eat add corn, but drain the excess liquid from the can first, and add the frozen peas. Keep lid off from here on out.
  4. Kill the heat, if it isn’t thick enough for you, add some box potato flakes. Fish out the bay leaves, ladle into bowls (bonus points for bread bowls) and serve.

I love to eat beef stew with a crusty yeasty whole wheat bread and butter for dipping. Bread aside, you’ve got a very lean low fat meal with this stew, it is easy to make, cleanup is easy since it is just 1 pot that was used. This recipe should feed 4 people so if you’re just 1 or 2 people you’ll get leftovers as well.

If you want to punch up the flavor consider these additives (liquids requiring additional thickening or in place of some of the beef stock):

  • Parmigiana cheese rind (when you buy the nice/real parmigiana reggiano cheese, save the rinds after you use it up, add them to soups & stews).
  • A cup or two of red wine.
  • Small amounts of balsalmic vinegar or worcestershire sauce.
  • A cup or two of beer, a strong full body beer (I like honey wheat) is preferable to a light drinker’s beer.
  • Any beef bones you have (always save your bones in the freezer and add them to soups).
  • Finely chopped leek.
  • Parsely, Basil, or whatever your favorite herbs may be.

My Healthy Protein Muffins

My wife has a need for a good, quick, high protein & high fiber breakfast. She is in medical school and has to get up really early most days to go to the hospital and so she doesn’t have time anymore to eat her normal breakfast of either oatmeal or Egg Beaters. Her default option is a so called “power” or “protein” bar of any of a variety of brands. The problem is most of those bars contain lots of extra simple sugars and other sweeteners, and they also contain a lot of preservatives and other junk. When you eat simple sugars your body ends up burning them really quickly and then has to use insulin to counteract them, this results in cyclical manic & depressive metabolism in your body and it isn’t healthy, and it just makes you want to eat more. The more complex your food is, such as complex carbohydrates & protein, the longer it takes to digest and the more even your metabolism will be. This will help keep you energized longer and feel fuller.

So I decided I could figure out for her a muffin recipe that’d give her everything she wanted, and still taste good. These muffins are extremely nutritious and taste like carrot cake. Here is the recipe:

Flax Carrot Cake Protein Muffins

Healthy Protein Muffins

  • 1 Cup Stone Ground Whole Wheat Flour
  • 1/2 Cup Soy Flour
  • 1.5 Cups Flax Seed Meal
  • 1 Cup Soy Protein Powder
  • 3/4 Cup Rolled Oats (Oatmeal)
  • 1/3 Cup Chopped Walnuts
  • 1/2 Cup Splenda Brown Sugar Blend
  • 1/2 Cup Normal Splenda
  • 2 Cups Skim Milk
  • 3 Medium Granny Smith (green) Apples, Pealed
  • 1 Cup Shredded Carrots
  • 1/2 Cup Egg Beaters or Egg Whites
  • 1 Cup Raisins
  • 1 tsp vanilla extract
  • 1.5 tsp ground cloves
  • 1.5 tsp nutmeg
  • 1.5 tsp ground ginger
  • 2 tbsp cinnamon
  • 1 tsp salt
  • 1 tbsp olive oil
  • 4 tsp baking soda
  • 2 tsp baking powder
  • (optional) 1/4 cup pomegranate or other high antioxidant fruit juice (the expensive stuff in the small bottles).
  1. Preheat oven to 350 degrees. Grease muffin pan (spray with non-stick spray) or line with paper liners.
  2. In large bowl mix together wheat flour, soy flour, soy protein powder, splenda, splenda brown sugar blend, salt, flax seed meal, oatmeal, cinnamon, cloves, nutmeg, ginger, baking soda, baking powder.
  3. In food processor process carrots until you have 1 cup, usually 2 cups or more whole carrots goes into making 1 cup of finely shredded carrots. Set aside.
  4. Peel, core and quarter your apples. Process in food processor until finely & evenly shredded.
  5. In large bowl mix together shredded carrots, shredded apples, raisin, and walnuts until it comes to an even consistency.
  6. In large bowl combine 2 cups of milk, egg beaters, vanilla extract, and oil (and optional fruit juice). Whisk rapidly until it gets foamy, about 5 minutes.
  7. Pour milk & egg mixture into flour mixture and fold together using a large spoon or spatula, do not over mix and stop once you no longer see any dry ingredients.
  8. Fold apple & carrot mixture into milk & flour mixture using a large spoon or spatula, stop when all ingredients seem evenly dispersed.
  9. Ladle mixture into muffin pan, filling each cup to the very top, even overfilling slightly. Due to the protein there shouldn’t be too much rise. Should make about 18 muffins.
  10. Bake in 350 degree over for 25 minutes or until toothpick inserted in center comes out clean.

So, that is the recipe, now lets talk about it.

First I want to cover the ingredients. Stone ground whole wheat flour is the best kind of wheat flour you can buy, the stones give it a coarser grind and so more of the wheat kernels get into the final product, this increases the protein & the fiber. Mixing in soy flour gives added soy nutrition, more protein, and more fiber, including soluble fiber (stuff really good at cleaning out cholesterol). Flax seed is one of the healthiest foods to eat on the planet, it contains more omega-3 fatty acids than any other plant source (that I know of anyways) it contains large amounts of protein, and large amounts of fiber, without as much fat as other nuts. The buns I buy have flax in them, the pasta I buy has flax in it, and I add it to things I bake (even cookies and meatloaf). Then let us consider the soy protein powder. This is just pure protein as derived from soy, it includes soy antioxidants and is of course a great source of lean protein. Finally among the dry stuff we’ve got the oatmeal, which adds fiber, soluble fiber, and even some protein.

The wheat flour is available at most stores, my local stores also carry the soy protein powder, the flax seed meal, and the soy flour. They don’t carry it in large quantities so you might have to look harder, but they do carry it. Try looking down the baking isle by the speciality flours or gluten free fair, or if there is a healthy living or organic food section in one of the dry goods isles. If you cannot find it at a store you can buy it online at say Amazon or find it at a health food or nutrition store.

Moving on, the muffins also contain a lot of carrots & apples. This ups the fiber and provides vitamins, minerals, and antioxidants. It makes the muffins a serving of fruit & vegetables for your daily needs. Eating healthy isn’t just about eatting fewer calories, but also about eating more nutritious foods, apples & carrots are both highly nutritious.

We’re using 2 cups of skim milk in the muffins, this is a lot of liquid but all the protein based dry ingredients really need liquid to balance them out. The milk provides good milk protein, which is just about the highest quality protein you can get outside of meat, calcium of course, as well as typical vitamin D.

The muffins use Egg Beaters or egg whites instead of normal eggs. Egg Beaters are just egg whites that have had food coloring added (to look yellow) and some vitamins added. By not including any of the yolk you cut down on around 70% of the calories and 100% of the cholesterol in eggs. Normally this might result in a less moist baked product, but all the fruit in these muffins contribute adequate moisture.

We also add 1 tbsp of olive oil to counteract some of the stickiness of the protein and provide help with residual moisture. You could use any oil, but olive oil is healthier and provides more vitamins and antioxidants.

We’re only using a 1/3 of a cup of chopped walnuts, other recipes might call for more. The issue with walnuts is they’re basically a less healthy version of flax seeds. They contain less fiber, less protein, and less omega 3 fatty acids, but many more calories. Compared to any other nut walnuts will be healthier, but compared to flax seed meal they’re just not. So we’re only adding the walnuts for crunch factor, but still they do contribute protein, fiber, and omega 3s, just not as much as the flax does.

The raisins contain a lot of sugar, but it is all natural unrefined sugar, so that isn’t so bad. Raisins also contain tons of antioxidants, they’re one of the most antioxidant rich foods, and they’re still a little juicy so they provide a nice texture contrast with the nuts when eating the muffins.

Then there is the Splenda. Splenda is a great sweetener that tastes like sugar so you hardly notice the difference. In only a few applications can you not replace sugar with Splenda. In this case we’re using Splenda Brown Sugar Blend & normal Splenda. The Brown Sugar Blend is a blend with real brown sugar, so there are calories there, however it is necessary because brown sugar contains properties that sugar substitutes just don’t. In total using Splenda probably saves 50-100 calories per muffin.

Rounding up the rest of the ingredients are the baking soda & baking powder. These items are what create the bubbles in the muffins that allow them to rise and be fluffy. It is important they not be too old so check the expiration dates on yours, also, if you bake regularly, you may think I’m asking for a lot of both, and I am. This is because all the protein in the mixture requires extra help in rising. Then of course there are the spices, you can add more or less depending on how much you like the carrot cake flavor.

The last ingredient is the optional fruit juice, and really this is optional. If you want a little extra flavor and or antioxidants you can use it. Use the good juice though, the 100% fruit juice of pomegranate, blueberry, mangosteen, acai, or other high antioxidant fruit juice. This juice is usually not stored by the other juice, but usually in a refridgerated section and usually is fairly expensive and comes in smaller glass or plastic containers. I like using it as an additive and I never drink it straight.

So, that is all the ingredients and why I use them.

As far as the cooking method goes, it is very important to mix all the things separately as I have indicated. Firstly you want to mix the dry stuff thoroughly before it gets wet to make sure the baking soda & baking powder as well as the spices get evenly distributed. You cannot overmix it at this stage.

Then you whisk the milk & egg mixture to make sure it gets thoroughly combined but also to create those bubbles that will also help to create air pockets & rise in the final mixture.

Finally you mix the apples & carrots thoroughly to make sure they end up evenly distributed and so the end muffins aren’t like all carrot or all apple depending on which muffin you bite into.

The reason you cannot simply add everything together and then mix is that excessive mixing of the flour once the liquid has been added will cause the protein called gluten to get even more rigid making the muffins even more chewy than they’re already going to be. So you mix the 3 main component mixtures thoroughly prior to mixing it all together so that when it all does come together you have to do as little mixing as possible. This concept is important for just about any baked good, you almost always want to mix the wet stuff & the dry stuff separately before adding them together.

Nutrition
If you end up with 18 muffins and use everything I have mentioned you’ll get the following numbers per muffin:

  • 205.5 Calories
  • 11.08g Protein
  • 5.7g Fiber

Try finding a health bar that contains so few calories, so much protein, and without any added weird or unhealthy junk such as high fructose corn syrup, or any sort of hydrolyzed protein. Also, my muffins contain no saturated fat, no trans fat, and no cholesterol.

So, if you’re trying to lose weight or just want a quick & healthy breakfast, make up a batch of these, and refridgerate them for storage, or freeze them. (All the unsatured fats & proteins in the muffins really can end up going bad quickly, so keep them in the fridge). If frozen you can thaw them as needed by taking one out the night before and putting it on the counter in a container of some sort.

Eat one or two for breakfast, depending on your weight loss goals or calorie needs. If you plan on eating two though don’t eat them at the same time. Eat one, and wait until you’re hungry again (even if it is just 30 minutes) before eating the second one. This will keep your metabolism going and keep your fuller longer.

If you like this recipe, check out my similar healthy chocolate brownie recipe too.

How to Make a Healthy Cheeseburger

A Healthy Burger
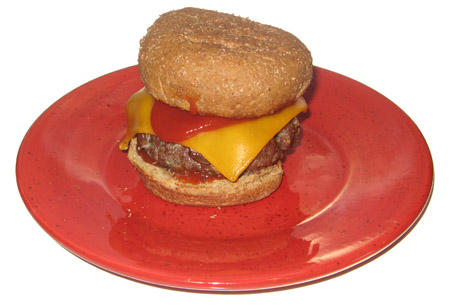
No, I did not mistype the title of this post. I am going to tell you how to make a healthy cheeseburger (or hamburger, if you’re a weirdo who doesn’t like cheese).

Most burgers will receive the bulk of their calories from two locations, the bun, and the meat. First let us focus on the meat.

Ground beef comes with varying degrees of fat content depending on which part of the animal it is from. It is usually noted on the package with a fraction such as 87/13 (13% fat) or 95/5 (5% fat). More fat, more juice, more calories, a lot more calories. You can get a difference of a few hundred calories, per burger, between the leanest ground beef and the fattest. The leanest you’ll find is usually ground sirloin, with the 5% fat, the worst is plain ground hamburger, which is made from scrap rather than any specific cut of meat, and has a really high fat content.

Of course, the best option, is to not use ground beef at all, use buffalo.

I’m proud to say I’ve entirely given up ground beef. I don’t need it, buffalo is better tasting and better for you. American Buffalo or Bison are the same critter and were a key component of the Native American diet until the white man came, then there were hunted almost to extinction but have since made a great recovery, there are now herds free roaming and many ranchers raise them for meat.

Unlike cows buffalo have not been domesticated for thousands of years, this has given them more natural evolution and so they’re healthier animals. It is (apparently) illegal in the US to give buffalo hormones or antibiotics, unlike domestic cows which get such injections all the time. So buffalo are, by law, organic. Additionally buffalo have no problem putting on weight so they aren’t force fed super grain or anything like that, they just graze on grass like they always have. Buffalo also don’t get ecoli like cows do.

The thing about buffalo though, is the meat is extremely healthy. It has less cholesterol or fat than skinless chicken breasts, and even some types of fish. You’ll notice this when cooking it, you’re probably used to watching your burgers shrink on the grill as the fat runs out, buffalo burgers do not shrink when cooked because they are lean.

I still use beef for steaks, because I can’t find a local source of buffalo so I have to order it online and it comes frozen and frozen ground meat isn’t a big deal, but I’d prefer fresh and not frozen steaks. Plus, with steaks, I can more easily limit my calories by only ordering leaner loin cuts.

Anyways, I have most recently ordered ground bison from Buffalo Gal, they had a 60 pound deal where the price per pound, even including shipping, was close to ground beef. I have a big freezer in the basement, so I bought it. According to them they use extra lean ground bison and their calories per pound are 600 calories, 11.2 grams fat, 96 grams protein. So, using their bison, a 1/4 pound burger will get you 150 calories, 2.8 grams fat, 24 grams protein. Not bad for starts.

Then there is the bun, a bunless burger would be best, but this post is about making a true cheeseburger and so we need the bun. I recommend a healthy protein infused multigrain bun like my favorite buns. These have only 170 calories per bun, give you 10 grams of protein and 5 grams of fiber, thats great for a bread product.

So, here is the recipe.

Assuming you start with a 1 pound package of ground buffalo, decide on how many burgers you want. For health reasons I recommend eating no more than 1 burger per meal. But in anycase if you want to make 4 burgers use the whole package, 2 burgers cut it in half. Or, one thing I do is always plan on making 4 burgers but refridgerate two of the patties to make them to the next day. I don’t mind having them two days in a row, but it does kind of annoy my wife.

So, here is how to make the burgers:

Step 1, start carmelizing onions, this can take 30 minutes or more and will give you time to do the rest.

Disclaimer, I never measure any of the seasonings, I eyeball them, so consider these estimates. I urge you to experiment yourself.

Assuming you’re using half a package (half a pound, 2 burgers) do the following.

Place the meat in a large mixing bowl, I like the big stainless steel bowls.

Add 1 tablespoon of dried oregano.
Add 1 tablespoon of Worcestershire sauce.
Add 2 minced garlic cloves, or 1-2 teaspoons of pre-minced garlic (what I do).
Add 2 tablespoons of very finly minced onion, or just 1 tablespoon of onion powder if you’re feeling lazy.
Add 2 tablespoons of egg whites, better Egg Beaters (if you have them).
Add 1 tablespoon of breadcrumbs.
Sprinkle with salt to your preference (Start with just a teaspoon).

Mix all that up hardcore.

This blog isn’t meant to just be recipes, it is meant to teach you how to cook, so what are all those ingredients for? Well the oregano and garlic are mostly just for seasoning. The Worcestershire sauce seasons as well, but it also adds salt, the salt is also just for salt. The onion adds flavor, but also liquid keeping the burger moist as it cooks (leaner meats can otherwise be dry). Onion powder doesn’t add moisture so it isn’t a perfect substitution. The egg whites or Egg Beaters are meant to help the burger hold together while cooking, and the breadcrumbs will absorb moisture so also help make the burger more moist.

Once that is mixed up well form your patties, you can use burger forming gadgets, or do it by hand with spatulas and make square ones. I like to find a large glass the same diameter as the buns I will be using and flatten the meat out and then cut it out using the glass. However this works best when making 4 patties as then the 4th is always the left over bits I have to form by hand, with just 2 or 1 you couldn’t do it this way.

Now, get yourself some pineapple out. If you have a whole pineapple, check out this video on how to cut one up, stop at the point though where he’s got it into long hot-dog-bun sized chunks, at that point he cuts the core off the inside, and then I would go further and cut ones right down the middle the long way to make skinny 1/8th of the pineapple strips. Plan on atleast 1 of these strips per person. You can put them on kabobs too if you want.

Now, we cook!

If you’re using a grill preheat it and lub it up with a spray or with a little papertowel dabbed in oil, if you’re using a broiler in your over turn it on high and arrange a rack 6-8 inches below it (second highest level usually).

On the grill place the burgers on the bottom rack and place the pineapple slices on the rack directly above. If you only have 1 rack put the slices off to the side as far from the heat as possible but still on the grill. Then, if you have a third top rack put your buns face down on that top rack, if not, run your buns through your toaster. Close your lid and give it 5-10 minutes on medium high. You know how your grill works better than I do though. Flip the burgers once the bottoms have nice brown grill marks, and do the other side. Flip the pineapple once too.

Right before the burgers are done you need to load them up with the onions, put the carmelized onions directly on the burger, then add the cheese. I like sharp (aged) cheddar for this, slices not shredded. White or yellow it doesn’t matter, just that it is nicely aged. You could use fat free cheese here and save half the calories from it, but cheese is my guilty pleasure, I eat healthy elsewhere just so I can eat real cheese. Kill the heat, close the lid or put the broiler pan back in the over, and let the residual heat melt the cheese. We put the onions on first, then the cheese, so that the cheese holds the onions in place, otherwise they’d slip out all over.

Load yourself up with ketchup, and you’re good to go. Healthy buffalo burgers with grilled pineapple. Maybe have a salad too or something. So how do the calories add up?

Meat: 150 calories.
Stuff we added to the meat (Garlic, onions, sauce, egg beaters) lets estimate at 50 calories.
Bun: 170 calories:
Cheese: 90 calories is typical for 1 slice of good cheddar.
Onions: Almost impossible to count, probably 1/4 of a cooked onion, but there is some oil we cooked them in. I’d estimate on the high side and say 50 calories max.
Grilled Pineapple: Well, an entire pineapple has just 227 calories, we’re eating 1/8th of one per person, so that gives us ~29 calories. Heck, treat yourself, have 2 pieces heh.

So, in total, you’ve got 460 calories in the burger, around 40 grams of protein, maybe 8ish grams of fiber. With very little in the way of simple sugars it could keep you full for longer as well. Then the pineapple side only adds 29-58 calories depending on if you have 1 slice or two. You could go and get yourself an ice cream sandwich and still end up with less than 1000 calories in the whole meal. Of course my wife rarely finishes her burger so I usually end up eating 1.3 burgers bumping my total up a little bit.

Know your Spuds

The Humble Potato
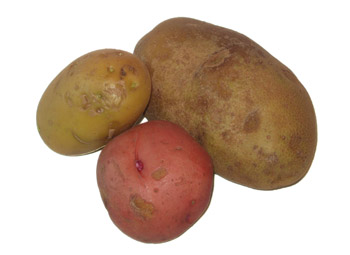
Mmmm, man food, meat and potatoes. And yet this is a nutritional food blog, so can I still do man food? I know can do healthy meat (but that is another post) but can I do healthy potatoes?

Yes, yes I can.

But first, a primer on the humble spud.

Potato Primer

Potatoes are swollen stems, or tubers, of a vine in the nightshade family. They come in many varieties and can generally provide more calories per acre than almost any other crop, which makes them great as a starch staple.

There are many varieties of potatoes, but the three main ones are red skin, yellow, and russet. Russet and red skin potatoes have white flesh, yellow potatoes (also called gold or Yukon gold) are yellow inside and out.

Red skin potatoes are small waxy potatoes, they have lower starch content and can better hold up to liquids without falling apart. This makes them excellent in stews or cooked with roasts or in any application where you will be doing long wet cooking. The skin of red skins is also often left on, merely cleaned with a stiff brush before cooking. Of course red skin potatoes are also good mashed.

Yellow skin potatoes are medium, medium in size, medium in wax, medium in starch. They’re generally considered to make the best mashed potatoes and are also good in fried applications, and do alright in a stew. These are the ones I buy most often. You can leave the skin on or take it off with these ones.

Russet potatoes (the big brown ones) are large mealy potatoes and aren’t at all waxy, they’re good baked, and pretty much only baked. They aren’t as good mashed as yellow skin potatoes, they don’t hold up in stews or other slow cooking dishes like red potatoes. I only buy these if I’m baking them individually.

Potato Health

Alas spuds are much maligned as unhealthy, but when you get right down to it and look at the calories in a typical potato you’ll notice something odd, namely, there isn’t all that many calories. Indeed, the potato hardly has any more calories than an apple.

What gets you with potatoes is the butter, the sour cream, the actual cream, the gravy, and everything else that you add to them. They’re rather bland alone afterall and it is all those high fat (though, you can make healthy gravy) toppings that make the overall dish unhealthy.

So, don’t be afraid to cook potatoes, just make sure you don’t smother them in butter. In situations where you’re not going to add anything to them they can be quite healthy, in moderation of course, a pound of any food at dinner will pack on the pounds. The healthiest application for a potato would be baked plain, but barring that when you use them in stews they aren’t seasoned with anything other than the stew broth, so the overall calorie addition thanks to the potatoes should be relatively low.

On the flip side, potatoes really don’t offer that much in nutritional value, not a lot of fiber, vitamins, or minerals. So in that regard they’re not doing you any favors.

What about sweet potatoes? Well, botanically speaking they’re not at all related. Sweet potatoes are rhizomes, potatoes are tubers, however sweet potatoes are healthier than normal potatoes. Not because they have less calories, in fact they have slightly more. Sweet potatoes are healthier because they are full of vitamins and minerals, they’re considered a superfood like carrots and in fact the survival of early American colonists has been directly attributed to the nutrition stored sweet potatoes provided during the winters. Also, sweet potatoes taste great when just seasoned with something like cinnamon, which doesn’t add any calories to the final dish.

Garlic Mashed Potatoes

This recipe isn’t actually very straightforward, because first you have to make garlic oil.

First step, buy some nice crusty artisanal bread, from a bakery, not an aisle. Then get some fresh raw garlic and some olive oil, normal is fine, you don’t need extra virgin.

Peel the garlic bulb and separate the individual cloves, peel the cloves (try smashing them to assist the skin in letting go of the clove). Fill up a small glass baking dish, the smaller the better, with the cloves from 1 bulb. Then cover with the olive oil until the cloves are all submerged. Cover with aluminum foil and put in an oven at 350 (you did preheat the oven right?) for 50 minutes.

When your 50 minutes are up pour the entire thing through a strainer, with the oil falling into a dish (you’re saving the oil). Put the garlic cloves in a small container, add italian seasoning (rosemary, thyme, basil, parsley, or just get an “Italian Seasoning” product that is premixed) and a pinch of salt, and mash gently with a fork or spoon until you have a paste.

Next, grate some “parmesan” cheese (parmigiano reggiano, aged 1 year atleast, better yet 2 years, expect to pay $15-$20 a pound for it, but it is worth it. Don’t use that stuff in a can, tip… save the rind when you’re done with the wedge you buy and use it to flavor a soup or stew, just toss it right in during cooking and remove it before serving)… so grate the cheese. Then slice your bread, spread on the garlic paste you made, cover with the cheese, and place on a cookie rack under the broiler in your over until the cheese is bubbly and starting to turn brown (keep your eye on it! it’ll happen quickly). Remove from oven, and enjoy the best garlic cheese bread you’ve ever ate.

Meanwhile on the counter a dish of olive oil will be cooling, except since you cooked it in garlic for 50 minutes it is now garlic oil. Put this in a little container (they sell neat little glass oil flasks at stores like Bed Bath and Beyond for a buck or so) and save it for when you make potatoes (or otherwise want garlic flavored oil).

Oh… right… potatoes, this post is about potatoes not garlic. So, you have garlic oil, and you have your chopped up potatoes. Put your spuds in salted boiling water until they’re done (when you can easily stick a fork in). Remove them from the heat, drain them, add some more salt to taste (start with a teaspoon), add parsley (the seasoning, not the garnish, there are two different kinds, the seasoning is technically called “Italian flat leaf”), and a few tablespoons of your garlic oil. Mash and serve (or hit it with some of that awesome parmigiano cheese and then serve).

How to Make Carmelized Onions

Barilla Plus PastaOnions, like some other vegetables such as carrots, have a lot of sugar in them. This isn’t to mean they’re sweet like a candy bar, it isn’t the same type of sugar. These are complex sugars.

When you take a vegetable with complex sugars and expose it to heat those sugars carmelize. This makes them taste really really good.

Now, if you put uncooked onions on anything I eat, anything, I’ll pick around them. Why people like them I could never fathom. However when you cook the onions all the bitterness evaporates and they become very good. So, if you’re like me and dislike onions when they’re raw, don’t assume you’ll dislike this recipe as well. Give it a try.

That all being said, I always buy sweet vidalia onions (or spanish onions, or yellow onions). Red onions don’t carmelize like I want them too, and white ones just don’t seem as sweet. I also buy the big ones you pick out individually, not the little ones in the bags.

Figure on one of those large onions for every 2 people if you’re using these onions as a topping for a meat of some sort. Cut it up however you like, if you want a finely chopped topping, finely chop it, if you want larger rings, leave larger rings. I personally cut the onions in half, then I cut again every quarter inch or so, and finally cut them in half.

Put the onions in a pan with enough olive oil to just cover the bottom of the pan (oil goes a long way, try spreading what you have by moving the pan around before adding more). Never go over medium heat. I like to start at medium to get the ball rolling but then I turn it back to a more manageable medium-low. You don’t want the onions to burn or saute, this really is just a sweat. Gentle heat to get the water out.

Also helping to remove water is salt. Through osmosis when you put salt on something it draws out moisture (concentrating flavors). Always, always, always, sprinkle salt on a vegetable you’re sweating or sauteing. Meats as well normally unless they’re cured meats (already salted, such as ham). If I had to estimate I would say it is 1 teaspoon of salt for each onion, but I only ever just sprinkle the salt with a salt shaker over the pan, I never measure it. Pretend you’re spreading grass seed and just try for even coverage.

It will take 30 minutes or more, with somewhat frequent stirring, but eventually the onions will have shrunk and be a nice golden brown color. They are then done. Put them on a burger, a steak, a braut, or just eat them (I eat the leftovers just plain). You can also save them in the fridge for a couple days.

Neat trick, if you’re making a meat loaf or meat balls you normally add onions, try carmelizing them first if you have time, it’ll add more flavor.

For a good recipe using this technique try this one, I’ve found it to be suprisingly good. In my preperation I do not use olives or capers, and I throw in a dash of basalmic vinegar. If making it as a main dish instead of a side I add some chopped up lean cured turkey sausage to punch up the protein.

How to Make Gravy with a Roux

Gravy is great, and it doesn’t have to be bad for you. Here is a quick and easy way to make relatively healthy gravy.

Start with your meat drippings, this can be from any type of meat, and make sure you run it through a fat seperator to get rid of the fat and keep the protein. If you don’t have enough drippings, add water, it’s okay, the dripping are concentrated anyways. You could also add a broth or stock product if you have one.

Decide how much finished gravy you want, and compare that to how much drippings you have. If you need to add more liquid (as mentioned above) do so.

For each cup of gravy you want to have add 1-2 TBSP of butter (more for thicker gravy, less for thinner gravy), per cup of gravy, to a saucepan and let it melt. Once it is melted add an equivalent amount of stone ground whole wheat flour (stone ground whole wheat flour is just about as healthy a wheat flour as you’ll get, so I recommend you use it). Stir while adding the flour and keep stirring (use a whisk). Until the mixture is a nice light golden brown. You could continue cooking it on low heat and eventually it’d darker, turn reddish, and the flavor would change. We’re not using it for flavor though so much as for thickening. So stop at light golden brown.

What you’ve just done is made a roux, a combination of equal parts fat & starch that is used for thickening. Starches like flour are great for thickening because when exposed to heat they burst and all their insides come out and thicken what they are in. However when adding them directly to water they clump and then must be stirred like crazy. If you add them to a fat instead they do not clump and by stirring you surround each starch molecule with fat, which will prevent them from clumping when they reach the liquid. So the cooked flour & butter combination is called a roux, and it is great for thickening anything that needs it.

Once your roux looks nice, add the meat drippings & water or broth or whatever you are using as filler liquid and bring it all to a boil while stirring. You’ll notice it thicken really quickly. Now you can add any seasonings you like, salt, pepper, thyme, rosemary, sage, parsley, whatever you like. I usually toss in a dash of balsamic vinegar no matter what kind of gravy it is. Worcestershire is a good idea for dark gravies as well.

When making a roux, remember dark ones have more flavor but less thickening power. If you cook it so long you see black specs you’ve burnt it, start over. When making a large batch try roasting it in the over ofer 300 degree heat until it reaches the color you like (less likely to burn it in the oven, trust me, although you aren’t likely to burn it when just making gravy, usually thats a soup thing where you want it to get dark).

In the end your gravy will be mostly protein (from the meat drippings) a little starch from the flour, and yes fat from the butter. You could use another form of fat such as olive oil or whatever you like, but butter makes the best gravy I think, and only a tablespoon or two in an entire pot isn’t a whole lot.