Books have been written about this topic, it is so easy, but yet, not everyone does it. Why? I’m not sure. If you care about your health, you should optimize the nutrition in your meals, which doesn’t mean eating a wheat grass smoothie for every meal. I like the K’s myself, and by K’s I mean Kale and Kelp.
Kale is an amazing superfood, a relative of Broccoli and Cabbage and Cauliflower and that whole family known as cruciferous vegetables. Think of it like Broccoli leaves. Maybe your only familiarity with it is in the zuppa toscana at Olive Garden. It is a powerhouse of nutrition. Cruciferous vegetables on the whole are, super duper cancer fighters.
I garden, so I grow kale and its super easy in the summer to just go out and pick a handful of leaves, chop them up small, and add them to whatever. At the end of the season before the snows come (because I do not yet own a greenhouse) I harvest all remaining kale and freeze it, to still enjoy it during winter months… though eventually I run out and must start buying it at the store.
Kelp is also an amazing superfood. Sea vegetables on the whole are chock full of vitamins and minerals, perhaps moreso than any other food on the planet. Including minerals people tend to be deficient in. I know what you’re thinking “Gross seaweed.” But it doesn’t have to be. You can buy kelp flakes, powders, capsules, but I just make my own. I buy bags of dried kelp from Amazon then just run it through my food processor (it can take awhile, its tough), until it is in tiny flakes. I then sprinkle these on lots of dishes.
How do use this double K power? As I’ve alluded to, you tuck it in here and there. Tonight, for instance, I made tacos. And normally to make tacos you cook ground meet and taco seasoning and…. nothing? Why nothing? Why not add something to it? All you’ll taste is the taco seasoning and the meat, you won’t taste the kale I add, or the kelp I add. I also typically add diced bell peppers and green chiles to my taco meat, sometimes black beans.
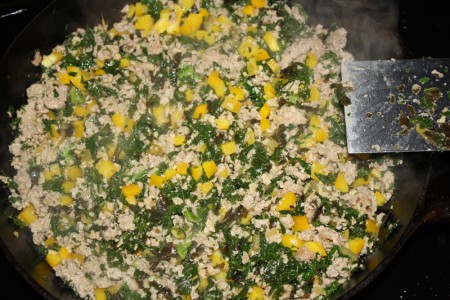
Taco Meat Infiltrated with Vegetables
Sure, you can see the vegetables now, before I add the seasoning, but after I do everything will be that brownish orange color.
You can add finely diced leafy greens to chile, soups, stews, any dish involving pasta & sauce, stir fries, quiche, underneath the cheese when making cheeseburgers (sneaky!), sloppy joes, any sort of ground meat dish really, and pretty much any casserole.
In addition to the dynamic K duo, spinach is also a good choice, or add some of all three. If you know what purslane is (a highly nutritious weed) you can also pick that and toss it in in the summertime, I do (though I also grow it on purpose). Another nifty thing is that leafy greens are among the easiest plants to grow. Even if you’re not much of a gardener, you’re eating leaves, not fruit, so you harvest the plant sooner and there are less pest and disease problems to worry about (if a caterpillar eats a whole in a leaf you can still eat the rest of it). So you can grow your own and just pick small quantities as needed to add a little more nutrition to your family’s regular diet.
So even if your kids (or husband/wife?) frequently turns their nose up at healthier foods or vegetables, you can sneak it in. Their heart will thank you, even if they don’t.


Recent Comments