Butternut Squash Soup

My wife says this is the best squash soup she has ever had, and she gets it at lots of restaurants.

Butternut Squash Soup

1 Butternut Squash
1 Large Parsnip (white carrot very very high in potassium)
2 Green Apples
1 Large Sweet Onion
1 Leek (optional… leeks are the giant chive looking things – make it two onions if you leave it out)
2 Quarts Chicken Stock
4 normal, 3 huge, or 5 small yukon gold potatoes
1 large carrot, or however many small ones for the same amount
A couple cloves of garlic, minced
salt
bay leaf
saffron if you have it or want to use
ground nutmeg, freshly shaved is so much better if you find it.
ground cinnamon
chopped chives (optional)

Preheat the over to 425.

Peel the squash, then cut it into chunks, and scrape out the seed cavity (as if you were carving a pumpkin) the chunks should be of moderate size, say, 2 inches.

Clean and chop the potatoes, peeling is optional Medium chunks, 1 inch

Peel and chop the parsnip. medium chunks, 1 inch. Ditto with carrot.

Stick peeled & chopped veggies in a 13×9 baking dish, drisle with olive oil, sprinkle with salt, and toss around for even coating. Stick it in the oven for 30 minutes.

Peel the onion and stick it in a frying pan to carmelize (low-medium heat, salted, a little bit of oil, stirring constantly, until soft). Cut the top and bottom off the leek (you eat the middle part, the white part, with a little green towards the top), cut it in half lengthwise. Rinse it out to remove any dirt, and then chop it up. Stick it in with the onion.

Peel, core, and cut up the apples into 6 slices each. When the oven beeps open it up, toss in the apple, and stir all the veggies. Set the timer for another 30 minutes.

When the oven beeps a second time, put all the veggies into your crockpot (the onion & leek, and everything from the oven) pour over enough chicken stock to cover, add a bay leaf or two, and the saffron if you’re using it, and the garlic. Cook for a few hours, or all day.

30 minutes or so before you want to eat, preheat the oven to 350.

Slice up a nice whole grain baguette, put some cheese (Swiss, gruyere (aged swiss), provolone, parmigiana, mozerella) on top of each slice, stick it in the over until it is toasted.

Meanwhile, get out your immersion stick blender (a must for any serious soup maker), open up the crock pot, remove the bay leaves, and blend it up until smooth. Add a few teaspoons of fresh ground nutmeg (I usually shave off half a nut with my microplane grater), and a tablespoon of cinnamon, blend some more, taste, add more seasoning if desired.

Kill the heat (make sure to check your bread so you don’t burn it), and add 1 cup of milk (you could also use half and half, or cream, but I think milk is just fine). Blend again to mix the milk in well.

Ladle into bowls, garnish with chopped chives and or black pepper if desired, and serve with toasted cheese bread.

Low calories, very very very nutritious, and you get to use two or three veggies you don’t often use (and so may miss the vitamins etc they provide).

Picture coming, next time I make the soup, which should be soon since I just harvested a bunch of squash.
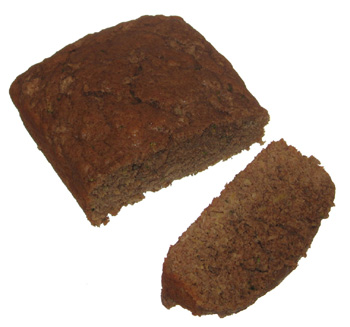
The Best Zucchini Bread I’ve Ever Made

I made this bread recently, it was so good, the best I’ve ever made. Not that unhealthy either.

IngredientsAwesome Zucchini Bread

  • 1/2 cup soy flour
  • 1/2 cup all purpose flour
  • 2 cups whole wheat pastry flour
  • 1 teaspoon salt
  • 2 teaspoon baking soda
  • 1 teaspoon baking powder
  • 1-2 tablespoons cinnamon
  • 2 large eggs
  • 2 cups splenda
  • 2 cups grated zucchini
  • 2/3 cup canola oil
  • 1/2 cup egg substitute
  • 2 teaspoons vanilla extract
  • 2 8oz cans of crushed pineapple

Directions

  1. Preheat oven to 325.
  2. Lightly spoon flour into measuring cups and level, combine flour, salt, baking soda, baking powder, and cinnamon in a large bowl, mix well
  3. Beat eggs with a mixer at medium speed until foamy. Add splenda, zucchini, oil, egg substitute, and vanilla, beating until well blended. Add to flour mixture, stirring just until moist. Fold in pineapple. Spoon batter into 2 loaf pans coated with cooking spray. Bake at 325 for 1 hour or until a toothpick inserted into the center comes out clean. Let cool.

So I got this recipe out of Cooking Light and tinkered with it a little bit, making it actually healthier. Then, because I felt like experimenting, I used 3 different types of flour. Why? Because I have many different types of flour in the house, and I thought, why not? It certainly turned out awesome so I recommend you follow my lead. With the directions as is I thought the batter was a little thick, well, very thick, for me so I added the juice from the pineapple and added some milk and more oil to get it to a nice consistency. If you’ve made quickbreads like this before you’ll know the consistency you want.

One loaf can be frozen for a month and defrosted on the counter if you like, but man, this bread was awesome, truly, the best tasting bread I’ve ever made. And it gives me something to do with all the zucchinis I get from my garden.

Right now in the oven I have a alternative going. I swapped the 16oz of crushed pineapple for 16oz of maraschino cherries and I added half a cup of dark chocolate (hershey’s special dark) cocoa powder. We’ll see how it turns out.

Chocolate Super Healthy Brownies

As I’ve mentioned previously, my wife likes a quick breakfast, and I don’t think shelf bought “protein” “energy” or “power” bars are altogether that healthy with their 20 grams of sugar and whatnot. I know I can do better, and so it was in that spirit that I developed this recipe for super healthy chocolate brownies. These are meal replacement/snack brownies, not dessert brownies.

Before we start, a word on chocolate.

Chocolate is healthy, no seriously, cocoa is very high in antioxidants, protein, and fiber. The fact that it is often mixed with saturated fats and sugar is the problem, but cocoa solids themselves are quite healthy.

To maximize the health of your chocolate snacks always look for the darkest chocolate you can possibly fine, but even though, fats, if not sugars, are necessary, to make chocolate bars or chips of any type.

Ergo, the healthiest way to get chocolate is to find dark chocolate cocoa powder. Cocoa powder is chocolate solids with all the fat removed, but you still get the flavor. Normal cocoa powder isn’t so bad but dark cocoa powder will have 66% less calories, more protein, and more fiber.

Chocolate Super Healthy BrowniesChocolate Super Healthy Brownies

  • 1 can Pumpkin Puree, 15oz
  • 1 cup Whole Wheat Pastry Flour
  • ½ cup Rolled Oats
  • ½ cup Flax Seed Meal
  • 1 cup Soy Protein Powder
  • 1 cup Hersey’s Special Dark Cocoa Powder (or other dark cocoa powder)
  • 1 cup Splenda
  • 4 tbsp Cinnamon
  • 1 cup Egg Beaters or Egg Whites
  • ½ cup Light Sour Cream
  • 1 cup Skim Milk
  • 2 tsp Baking Soda
  • 1 tbsp vanilla extract
  • 1 pkg(16oz-ish) Dark (60% + cocoa) Chocolate Chips (optional)
  1. Preheat Oven to 375
  2. Mix all the dry stuff (oats, flour, flax seed, protein powder, cocoa powder, splenda, cinnamon, and baking soda) together, really well. Sift it if you want.
  3. Put the Egg Beaters in a big bowl, very big, and beat with a hand mixed until nice and foamy and or soft peaks. Normally if making something like an angel food cake we’d be careful now, but we’re not making an angel food cake, so…
  4. Add the pumpkin and sour cream into the bowl and mix well, add the milk and vanilla and start adding the dry mixture a little at a time.
  5. Meanwhile in another part of the kitchen, if you want it extra chocolately you’ll need to melt the optional chocolate chips in a double boiler or a microwave and then drizzle into the mixture, or just drop the chips in if you’d rather have chocolate chunks in the finished product, your choice.
  6. When your mixture has fully come together, stick it into a lubed 13×9 baking dish, it’ll be thick, you should spray the back of a spatula with some non-stick spray to help spread it around. When it is good and even pop it in the oven for 1 hour.

Now, if you cut it into 12 portions, which is typical I think, each one will have:

Without Chocolate Chips: 137 calories, 14g protein, 6g fiber
With Chocolate Chips: 230 calories, 16g protein, 7.5g fiber

Chocolate chips also add sugar and saturated fat. You could also, instead of chips, add chopped nuts, raisins, or something like that. Compare the calorie total of the sans-chip version to any “bar” based food out there. No added sugar, lots of antioxidants and vitamins, lots of protein, and lots of fiber. These brownies are super brownies.

On to the Ingredient Explanation….

I’m not here just to give you recipes, I like to teach why I include certain things in the recipe.

Start with the pumpkin, why do I put pumpkin in this recipe? Well, read the back of your can, see the part that says each serving has 300% of your daily vitamin A needs through beta carotene? That means, that roughly each brownie should end up with 100% of your daily needs, not bad. Vitamin A is a key vitamin but too much of it can cause problems, especially in pregnant women. Beta Carotene though is an entirely safe way to get Vitamin A as your body will manufacture it out of the beta carotene on an as-needed basis, storing any excess still as beta carotene, no chance for overdosing. Beta carotene of course also helps with a myriad of other things.

Whole wheat flour is there for structure, and we’re using whole wheat flour instead of all purpose flour for added protein, fiber, and nutrients.

Rolled oats add more fiber, especially soluble fiber to lower cholesterol, as well as protein. Oats are a super food, eat more of them.

Flax Seed Meal, another super food, is the highest plant source of omega 3 fatty acids (good cholesterol, like from salmon). It also adds fiber and protein.

Soy protein powder of course adds protein. Protein keeps your body healthy and your stomach feeling full.

The cocoa powder adds surprisingly large amounts of protein and fiber, and of course those excellent chocolate antioxidants.

Cinnamon has one of the highest concentrations of antioxidants of any food known to man, seriously. It also adds flavor without any added calories.

Splenda is our key sweetener, and is of course 0 calorie.

Egg Beaters are just egg whites that have been infused with vitamins and colored yellow. They add protein, the vitamins, and it is necessary to have a little egg in almost any baked good. We are using a lot of them though, because we want a lot of protein in these.

The sour cream adds more protein, and contributes moisture (we’re replacing what would otherwise be oil) to the final product. If you had to omit one thing, this would probably be it, I don’t know if it is so necessary.

The milk is our moisture, protein, vitamin D, calcium, etc.

Baking soda is for making it all rise, vanilla is for flavor, and the optional chocolate chips are, of course, for chocolate.

Ridiculously Healthy Chocolate Cake

Whole Grain Cocoa Angel Food Cake

  • 3/4 cup of whole wheat pastry flour
  • 1/4 cup of unsweetened cocoa powder (dark is better if you can find it)
  • 1 1/4 cups of splenda
  • 10 Egg whites (no yoke! get the cartoned egg whites).
  • 1 teaspoon of Cream of tartar
  • 1 teaspoon of vanilla
  • 1/2 teaspoon of lemon or almond extract
  1. Preheat the oven to 350ºF. Sift the flour, cocoa, and 1/4 cup of the sugar 5 times. Set aside. Sift the remaining 1 cup splenda into a separate bowl. Set aside.
  2. Put the egg whites in a superclean bowl and beat them with a hand mixer, you’ll want an actual hand mixer for this, not a stand mixer (they don’t work as well for whipping whites) and not just a mere whisk (your arm will fall off). Add the cream of tarter and beat until the egg whites form stiff peaks, but are not dry. A stiff peak means you can dip something in the eggs and then pull it up and out and turn it upside down and the white will form a peak and stand up straight.
  3. Gently fold in the sifted splenda, 1 tablespoon at a time (you need to be gentle, lest you depress the air bubbles you just made). Add the vanilla and lemon or almond extract. Slowly sift small amounts of the flour mixture over the batter and fold in until all the flour is incorporated. Pour the batter into an ungreased 10 inch straight-sided tube pan (angel food cake pan, 2 part). Bake for 45 minutes. Turn the pan upside down, over the neck of a bottle, and allow to cool. Remove from pan once fully cooled.

In total this cake has around 600 calories, meaning you could eat the whole thing and it’d only be 600 calories. Additionally it has a bunch of fiber and a bunch of protein. To the point where, if you had 1/6th of this cake, you’d have more protein, more fiber, and less calories, than a typical “energy” or “protein” bar.

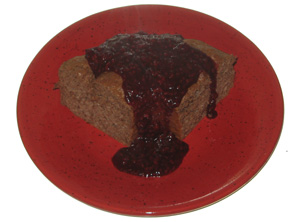
Serve it plain, with vanilla ice cream, or with a fruit sauce (any type of peeled fruit & berry in a deep skillet on medium heat, add splenda, possibly cinnamon or other sweet seasoning, then a corn starch & water/juice slurry. Simmer until all the fruit falls apart).

Butter Beer Cheesy Pork

Mmm, beer. What real men drink. And yet, how many of you know that beer is an excellent ingredient in the kitchen? In soups, stews, and marinades beer adds dimension like no other liquid. I tell you what, I like cooking with beer more than I like drinking it.

This recipe is a fairly original creation of my own, it is a combination of a few other recipes. I’ve made this numerous times, and every time it has turned out great. I love making it for guests in the summer as well.
Butter Beer Cheesy Pork

  • 4 10oz or so pork chops, cubed cutlets, tenderloin steaks, or any other pork steak cut you fancy.
  • 1 12 oz bottle honey wheat beer, the stronger the flavor the better.
  • 2 cloves garlic, minced
  • 1 tbsp olive oil
  • ¼ tsp salt
  • ½ tsp ground black pepper
  • 1 cup green onions, sliced thin
  • ½ cup chopped roasted pecans (bake in oven at 350 for 10m to roast pecans)
  • 2 tbsp flour
  • 2 tbsp butter
  • Sharp cheddar cheese, shredded, to taste (1-2 cups usually).

Alright, step one, pour the first 5 ingredients (through black pepper) into a zip top plastic bag with the pork. Set it into a bowl in case of leaks, and stick it in the fridge for 4 hours or overnight, longer is better.

Preheat your grill so that it is hot. This dish also tastes well when smoked. So you could use it with plank grilling (cedar). Take the meat out of the marinade, toss it on the grill (or on the wood plank on the grill) and cook to desired doneness, 30-45 minutes usually. But this will vary greatly depending on what cut of meat you are using.

When pork is about half way done put a saucepan on medium heat on your stove. Melt the butter and then when the butter is melted add the flour and whisk rapidly for 3-5 minutes. Then add the reserved marinade from the plastic bag and bring to a boil.

Once you’ve reached a boil let it boil for a few minutes, stirring occasionally, just to make sure it is fully cooked (the marinade was with raw meat after all) then lower the heat to a simmer and start adding the cheese, while whisking constantly.

Here you have decisions to make. How many people are you serving? How much sauce do you need to cover all that pork? I usually end up tossing in another beer into the saucepan, and more cheese, to make more sauce because I like the sauce. Since beer isn’t usually sold in 1 bottle packs, you’re bound to have another bottle in case you need to do the same. If not, water works but isn’t as flavorful. If you need to thicken the sauce more and do not want to add more cheese, make a corn starch slurry (equal parts cold water and corn starch, mixed together in a separate dish, then poured in, it has to be corn starch, flour will not work with cold water like this). Keep tasting the sauce to make sure you like it. The goal here is to make a good, syrup-like thickness, cheese sauce, in enough volume to cover all the meat.

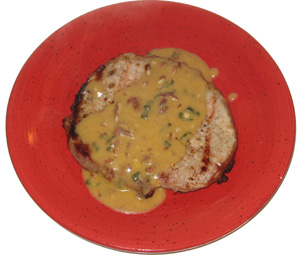
When you’re happy with the sauce and the pork is done, toss in the green onions and chopped pecans, mix, and then pour the sauce over the pork (or, pour it into a bowl and let people serve it themselves).

Is this dish healthy? Sorta, many pork cuts can be very lean, and you’re having relatively small servings of 8-10oz per person. The cheese sauce isn’t as healthy as it could be, but cheese is a very worthy guilty pleasure. The trick though is in the side dishes. Serve this meal with healthy sides like grilled or baked veggies, fresh fruit, and things like that. Don’t serve any bread, pasta, rice, or other starches with it. The pork itself might not be as healthy as it could be, but with good sides the overall meal can be.

Chemistry of Cooking: The Maillard Reaction

Cooking is very much a study in chemistry, you have to deal with acids, bases, heat, air pressure. Knowing the science behind the food will help to make you a better cook and further your understanding of why recipes go a certain way.

Today, I wish to talk about cooking methods and why they can affect your food.

Stews and boils are cooking food submerged in water, steaming is of course cooking food surrounded by water vapor, and braising is cooking food sitting in water (not fully submerged). All of those cooking methods have one drastic limitation, namely that water cannot exceed 212 degrees. Boiling water is going to be 212 degrees no matter how hard it is boiling. This means, anything cooked in water or water vapor will not be able to exceed ~212 degrees.

This is good in many ways. You can cook something for a long time and if there is adequate moisture you know it will not overcook or burn. It is really hard to burn things that are in boiling water, and that water helps moderate the temperature of your food, preventing drastic swings.

However, there is a major downside to cooking in water, and that is that it inhibits the Maillard Reaction.

For instance, any dish that requires a browned topping will always tell you to either cook uncovered, or uncovered for a period of time to brown the top. This is because covering a cover traps steam, which then keeps the temperature moderated at around 212, way too low for the Maillard Reaction.

So what is the Maillard Reaction? It is the reaction which caramelizes sugars in food to turn it brown. The most straightforward example is the creation of actual caramel from sugar. The sugar is denatured into over a hundred different compounds, creating a very sweet and complex taste.

But nearly everything has sugars (starches) in it, and so the Maillard Reaction is also responsible for making toast taste so much better than bread, for making skin crispy on turkey, for making grill marks on meat, and for making pretty much every golden brown and delicious food, golden brown and delicious. This all doesn’t really start to happen until around 230 degrees and continues on up past 300.

So, you can’t get browning, in any food, in the presence of water. So, if you want crisp, you need dry heat. This is also why you can’t really brown things in the microwave (microwaves just heat water, water can’t go higher than 212) and why non-stick pans can’t really brown food either (They also just don’t get hot enough… nor are they supposed to, high heat ruins their nonstick surface).

But in addition to browning the outside of food, the Maillard Reaction will work on the interior as well. This is why roasted vegetables taste so much better than boiled vegetables.

So, now you know. This is why certain foods taste better when cooked with dry heat, and this is why you are sometimes asked to brown and or roast something before introducing it to liquid.